Wednesday, December 5

Adding logic to the table looping and table extractor functoids

I recently had an unusual request which involved using the table looping and table extractor functoids...

The problem is described below:

the source schema had a node similar to the one below

<BookingDetails reference="234" referencecode="FD453" creationdate="2011-10-11"/>

The idea was to create a repeatable node like the one below from this schema. Basically, if both reference and referencecode are passed in from the source, I need to create a new instance (in the destination schema) of the repeating node below for each of them, using the Instance attribute to show which one is mapped to each node as shown:

<ns1:BookingID Instance="ref" DT_Context="2011-10-11" ID="234" />
<ns1:BookingID Instance="refcode" DT_Context="2011-10-11" ID="FD543" />

Basically, if any of the reference and referencecode nodes is empty or null, the table looping functoid should not create a loop for that null or empty node

Of course, I could use xslt, but the table looping functoid and the table extractor functoids were used to solve the problem in a few seconds

The mapping solution goes as such:

  1. Add a table looping functoid to your map
  2. Add two table extractor functoids to the map
  3. Add the BookingDetails node as the first [0] input into your table looping functoid. This tells the functoid that this is the node from which the repeating structure will be created
  4. We are interested in 2 attributes (could also be nodes) because we want the table looping functoid to loop values based on reference and referencecode. Open up the table looping functoid and type in the integer 2 as the second [1] input to specify that we want two columns from the functoid
  5. Now add the attributes 'reference' and 'referencecode' as inputs [2] and [3] to specify that this is where the data for the first column will come from
  6. For inputs [4] and [5], type in the strings 'ref' and 'refcode' respectively to show that these will be thwe values in the second column
  7. Open the second (Table Looping) tab of the functoid.
  8. In row 1 column 1, select 'reference' as the first entry
  9. In row 1 column 2 select 'ref' as the entry
  10. In row 2 column 1, select 'referencecode' as the entry
  11. In row 2 column 2, select 'refcode' as the entry
  12. Tick the 'Gated' checkbox at the bottom of the tab to show that the first column will be used as the logical gate for the functoid, meaning that if any of the inputs in this column return nothing, the corresponding loop will not be created
  13. Drag a link to the BookingID node of the destination schema to show that this will be the repeating node
  14. Drag a link (as output) to the first table extractor functoid
  15. Drag a link (as output) to the second table extractor functoid
  16. Open up the first extractor functoid and type in the integer 1 as input [1] to show that this will extract the first row of the first column
  17. Open up the second extractor functoid and type in the integer 2 as input [1] to show that this will extract the second row of the first column
  18. Drag a link from the first extractor to the 'ID' attribute of the BookingID node in the destination to show that this output will be mapped to the 'ID' attribute in the repeating node
  19. Drag a link from the first extractor to the 'Instance' attribute of the BookingID node in the destination to show that this output will be mapped to the 'Instance' attribute in the repeating node
  20. Simply drag a link directly from the creationdate node on the source to the DT_Context node on the destination as this does not need to be passed into the table and will be created for every loop of the table
  21. Build the map
If you now test your map twice with two messages derived from the source schema with the BookingDetails node set as in the two examples below, you should get the  bookingID structures like the two outputs shown further down (one of them will not repeat)

Input BookingDetails nodes
Case 1
<BookingDetails reference="234" referencecode="FD453" creationdate="2011-10-11"/>

Case 2
<BookingDetails referencecode="FD453" creationdate="2011-10-11"/>


Repeating Output BookingID nodes
Case 1
<ns1:BookingID Instance="ref" DT_Context="2011-10-11" ID="234" />
<ns1:BookingID Instance="refcode" DT_Context="2011-10-11" ID="FD543" />
Case2
<ns1:BookingID Instance="refcode" DT_Context="2011-10-11" ID="FD543" />

 Hope this helps someone

Wednesday, October 10

Xslt compilation error when testing map with inline XSLT

I recently came across this non-descript error while testing a map which had an inline XSLT call template on some nodes.

XSLT compile error at (116,6). See InnerException for details. Prefix 'ns1' is not defined

It was due to a silly oversight really, but it could throw you at first because of it's vagueness.

In my inline XSLT call template, I had a test script which then created various nodes based on certain conditions being met...

<xsl:if test="/*[local-name()='MyTopNode' and namespace-uri()='http://www.namespace.com/namespace/']/*[local-name()='NextNode' and namespace-uri()='http://www.namespace.com/othernamespace/']/*[local-name()='Warnings' and namespace-uri()='http://www.namespace.com/namespace/']">
    <xsl:element name="ns1:Warnings">  
   <xsl:for-each select="./*[local-name()='Warning' and namespace-uri()='http://www.namespace.com/anynamespace/']">
  <xsl:element name="ns1:Warning">


Note the bit in red. I have obviously failed to define what the prefix stands for, which means that if it so happens that BizTalk changes the prefix whilst mapping, ns1 suddenly means nothing and voila, the error is thrown.

To fix this, I simply modified the template as shown below to define exactly what I want my prefix(es) to represent and the error disappeared

<xsl:if test="/*[local-name()='MyTopNode' and namespace-uri()='http://www.namespace.com/namespace/']/*[local-name()='NextNode' and namespace-uri()='http://www.namespace.com/othernamespace/']/*[local-name()='Warnings' and namespace-uri()='http://www.namespace.com/namespace/']">
<xsl:element name="
ns1:Warnings" xmlns:ns1="http://www.namespace.com/whatIwantItToBe"/>
<xsl:for-each select="./*[local-name()='Warning' and namespace-uri()='http://www.namespace.com/anynamespace/']">
<xsl:element name="ns1:Warning">

Friday, October 5

Making sure the page goes back to the same position after postback / update

Did you know that ASP.Net has a very interesting feature which works like a bookmark?

If for example you wish to ensure that the user is returned to the same position on the page after a form edit or RadioButtonList selection, adding a MainatainScrollPositionOnPostback="true" property into your Page directive will create this effect

Tuesday, August 7

Deployment is currently disabled error when testing BizTalk maps from VS2010

When writing unit tests to test your BizTalk maps from within Visual Studio, you mat sometimes get the following error: Deployment is currently disabled. DeploymentItem "_" on test "_" was not deployed


To fix this error, double-click on the 'local.testsettings' file in your solution


Click on the 'Deployment' tab on the left pane, and click on the 'Enable Deployment' tick box


The tests should run as expected now

Thursday, July 26

BizTalk System.ServiceModel.AddressAccessDeniedException

You configure a self-hosted service at a BizTalk receive location using a localhost address, and when you try to enable the service (receive location) you get the above error with the details 'HTTP could not register URL http://+:80/Sales.CreateFlightBooking.HoldFlightSegments.v1/. Your process does not have access rights to this namespace'

To overcome this issue, you need to

1. Open the Visual studio command prompt (using the run as administrator option)
2. Type in the command netsh http add urlacl url=http://+:80/<the rest of the address that comes after localhost/> user=DOMAIN\username (So, if your full address is http://localhost/company.bookings.carbookingservice, you type in http://+:80/company.bookings.carbookingservice)
3. Enter to run the command

You should then get a 'URL reservation successfully added' message

Go back to enable the receive location. It should start successfully now (I sometimes reset IIS before this step )

Thursday, June 7

Adding validation code in SOAPUI mock services

If you have a requirement to run soap message validation within your SOAPUI mock service, the following steps will fulfill this requirement.

You might first start by viewing and implementing my blog here: Deploying a SOAPUI mock service as a web application to know how to get your mocks running and hosted outside of SOAPUI

1. Once you have created your SOAPUI mock service, double-click on the mock operation you wish to run the validation against. This should open up the MckOperation properties as shown in the second image below


2. Change the Dispath option (shown above) from Sequence to Script to open the groovy scripting window

3. Enter the following script which basically compares the request message to the mock WSDL, and raises an error if it does not validate. The script then informs the mock service on which response message to return if an error occurs

def wsdlcontext = context.mockService.getMockedInterfaces()[0].getDefinitionContext();
def validator = new com.eviware.soapui.impl.wsdl.support.wsdl.WsdlValidator(wsdlcontext);
def msgExchange = new
com.eviware.soapui.impl.wsdl.panels.mockoperation.WsdlMockRequestMessageExchange(mockRequest,
mockOperation);
def errors = validator.assertRequest(msgExchange, false);
if (errors.length > 0 )
return "MockResponseInvalid2"
else
return "Response 10"


4. To create the error message called MockResponseInvalid2. Right-click in the mock responses window as shown below and click on 'New MockResponse' to create a new response


5. Give it a name that matches the name of the message you want  your mock to return when an invalid request comes through


6. At this point, you can either leave/modify the fault message or you can click on the SOAP fault button highlighted below to create a SOAP fault.


7. If you choose to create a SOAP fault, It asks if you want to overwrite the message. Click on Yes

8. Modify the resulting SOAP fault message as you wish.


9. You can now run valid and invalid requests against the mock operation to test your validation. Invalid request messages should return the soap fault message you just created

Thursday, May 31

Deploying SOAPUI mock service as a web application

I recently worked on a heavily TDD (test driven development) SOA project in which we used SOAPUI extensively to unit test atomic pieces of work. It was a large team of developers with a constant need to test new and on-going development work against mock services.

I tried to use the tutorial here but kept running into errors first wth JBoss and then with Tomcat (I eventually used Tomcat because I liked the UI better).

I have therefore re-written the tutorial with the steps I took to get the whole system in place.

Follow these steps to install Apache Tomcat  and then create and deploy your mocks as war (Web application ARchive) files

1. Download  and install the latest java SDK from http://www.oracle.com/technetwork/java/javase/downloads/ for your system (for me it was 7u4).
Run the relevant (jdk-7u4-windows-x64) installer with the default options, which will install Java into "C:\Program Files\Java\jdk1.7.0_04\". Note: ideally use the full JDK (Java Development Kit), which contains the JRE (Java Run-Time Engine) and other useful tools for developers


2. Install Apache Tomcat from http://tomcat.apache.org/download-70.cgi (I downloaded the apache-tomcat-7.0.27.exe from the 32-bit/64-bit Windows Service Installer (pgp, md5)
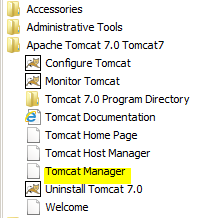
 link ). I installed Tomcat to port 8090 on localhost. Make sure the Tomcat Manager is also installed


If you would rather try JBoss as the web server, a lovely tutorial on JBoss can be found here

3. Open SOAPUI (A trial can be downloaded from http://sourceforge.net/projects/soapui/files/). The following mock service instructions are modified from this nice tutorial

4. We will now create a new mock service which will eventually be deployed and exposed via Tomcat. The first thing you will need is the WSDL of the web service you want to mock. I’m going to use a publicly available temperature converting web service available here: http://www.webservicex.net/ConvertTemperature.asmx?WSDL

5. Create a new SOAPUI project (Right-click on 'Projects' in SOAPUI)


5. Fill in the dialog as shown below, and click OK


You will be prompted by SOAPUI (after it inspects the WSDL) to set options for the Mock Operations for the ConvertTemp interface. Leave the port on the default srtting as tick the 2 boxes as shown below and click OK


6. Specify a name for the MockService to hold that interface. (I used ConvertTemperatureSoapMockService) and click OK


Repeat this process for the other MockServices prompted by IIS (I used ConvertTemperatureSoap12MockService)

You should now have something similar to the structure shown below


7.  Right-click on the project you just created and select the 'Deploy As War' menu item


8. Fill in the dialog as shown in the image below. (C:\Projects\MyTestMockLibraryFolder is the location to which I am deploying the web applicaiton for the mock service). Tick the 'Check to enable WebUI' checkbox so that you can view the mock service using the WebUI. Click on OK


SOAPUI will prompt you to save the project file so you can re-open it later if you need to modify it. Select a save location and click on OK. Note: Not sure if this is a bug or simply misleading interface, but SOAPUI will NOT create the war file in the War Directory you specify using the settings above. It will create the actual web applicaiton. If you want SOAPUI to actually generate the war file in the location, you need to fill in the 'War File' box by specifying the full path including the directory as such: C:\Projects\MyTestMockLibraryFolder\MyTestMockLibrary.war)

SOAPUI then creates the web application. The soapui log should be something like the image below


10. Browse to the specified War Directory and you should see the web application components

11. Open the WEB-INF folder and note the web.xml file

12. Check that Tomcat is installed and running by browsing to the port you specified when installing it. (http://localhost:8090 for me). You should see the welcome to Tomcat page. If not, check services and make sure that the Apache Tomcat 7.0 Tomcat7 service is running. Click on the 'Manager App' button

10. On the App Manager page, scroll down to the 'Deploy' section


12. Using the 'Deploy directory or War file located on server' section, fill in the Context Path as the service name for the service url you added in SOAPUI earlier (see first image below)


The Deployment seciton in the App Manager should look like the image below


13. In the 'XML Configuration File URL' box, type in the web.xml path for the file you noted in step 11 above (i.e. /WEB-INF/web.xml)

14. Type or paste the War Directory path into the 'WAR or Directory URL' box. The section should now look like the image below


15. Click on Deploy. You should see an OK message at the top of the App Manager window. Your web application should now be deployed


16. Still on the App Manager page, find the new service and click on the link


17. You will probably get an error page stating that the resources are not available. In the browser adress bar, add a forward slash to the URL (http://127.0.0.1:8090/TestMockLibrary becomes http://127.0.0.1:8090/TestMockLibrary/) and hit the Enter button on your keypad. You should now see the Mock Service page in the WEBUI.


18. Click on one of the Mock Operations as shown to view the WSDL


19. You can now call this service from any application using the URL as long as Tomcat is running on the host machine

Wednesday, February 29

SamlSecurityTokenRequirement enforceAudienceRestriction (AudienceUriMode) error when using BizTalk 2010 with a federated binding

When using a BizTalk 2010 WCF service in a federated environment, you may get the following non-descriptive error when you try to make a call into the BizTalk WCF service

"An unsecured or incorrectly secured fault was received from the other party. See the inner FaultException for the fault code and detail".

This error unfortunately has nothing useful in the innerexception more often than not. Various security issues could cause this error (including certificate authentication). Turn on tracing on the BizTalk receive location by adding the following section into the web.config file for the service.
You can add it between the <connectionstrings /> and <system.web> nodes (just a guide)

    <system.diagnostics>
      <sources>
            <source name="System.ServiceModel" switchValue="Error, Warning, Verbose" propagateActivity="true">
            <listeners>
               <add name="traceListener"
                   type="System.Diagnostics.XmlWriterTraceListener"
                   initializeData= "c:\log\BizTalktraces.svclog" />
            </listeners>
         </source>
      </sources>
  </system.diagnostics>
Make sure to create a "log" folder at the root of your c: drive as the configuration suggests. For the purpose of this troubleshooting, you can also grant full permissions to everyone on the folder to make sure it can be written to.

When you try to run the service again and check the BizTalktraces.svclog file in a text editor, you might find the following lines in the stack trace:

<InnerException><ExceptionType>System.InvalidOperationException, mscorlib, Version=4.0.0.0, Culture=neutral, PublicKeyToken=b77a5c561934e089</ExceptionType><Message>ID1032: At least one 'audienceUri' must be specified in the SamlSecurityTokenRequirement when the AudienceUriMode is set to 'Always' or 'BearerKeyOnly'. Either add the valid URI values to the AudienceUris property of SamlSecurityTokenRequirement,  or turn off checking by specifying an AudienceUriMode of 'Never' on the SamlSecurityTokenRequirement.</Message>

By default the federation binding will typically add a federationServiceHostConfiguration extension to the servicebehaviors section.

Open the receive location 'Behavior' tab, and click on the 'IssuedTokenAuthenticaiton' node. Set the audienceUriMode to 'Never'


Remove the federationServiceHostConfiguration extension from the configuration (should be in the same tab, above 'serviceMetadata', but has already been removed in the picture above).

This should stop the errors.

BizTalk 2010 message submission with transport-level security to SharePoint 2010 forms library without the WSS adapter - Part 2

The Form submittal WCF service

In this post I will try to briefly explain the steps needed to create a WCF service to submit BizTalk messages into a SharePoint 2010 form library

The steps are basically as follows:
1. Create a WCF service
2. Add a service reference to the SharePoint Copy service

The SharePoint environment includes built-in Web services in the Windows SharePoint Services that can be used to work with areas of the SharePoint object model remotely. Each Web application Web service is installed in the _vti_bin directory, which maps to the following file system location:
%COMMONPROGRAMFILES%\Microsoft Shared\web server extensions\12\ISAPI

These services allow developers to manipulate information stored in SharePoint sites. Msdn lists these services on this link

The WCF service below calls one of these services, namely the Copy web service, using the CopyIntoItems operation to post xml data into a form library hosted within a SharePoint site. the URL for the service(s) is typically relative to the site you wish to manipulate. e.g. http://sharepointservername/sharepointsitename/_vti_bin.copy.asmx

Below is the cample code for a WCF service which uses a service reference to call the copy service for my sharePoint site (this is very basic first-draft code showing the main functionality of the service, derived and slightly modified from R Seroter's example in his post, which I referred to in part 1). This is not a tutorial on WCF services, so please read about WCF services to understand the service better.

The Copy web service expects a few parameters:
  • The source uri, 
  • the destination path (including the SharePoint site URL, the form library name, which is the name of the form library created in part 1 and the filename you wish to call the form document when it is displayed in SharePoint),
  • the xml file itself sent as bytes,
  • an array of SharePoint properties related to the submitted xml
  • and the user credentials of a user with permissions to create the form in the SharePoint site. In this case, I pass the credentials in directly via the ClientCredentials of the proxy. I added the credentials into the web.config file as keys in the Appsettings section and called them within the code. That way, they can be changed when needed if the permissions in SharePoint need to be changed

ISendToSharePointFormsService.cs

using
using System.Collections.Generic;
using System.Linq;
using System.Runtime.Serialization;
using System.ServiceModel;
using System.Text;
 namespace
{

 [SendToSharePointServiceContract(Namespace = http://mynamespace/biztalk.wcf.SendToSharePoint/v1.0)]
 public interface ISendToSharePointFormsService
 {
  [OperationContract]
  string SendXmldoc(string strFile, string fileName, string servertouse, string librarytouse);

  [OperationContract]
  string GetXmlToString(string strFile);

 }
}


SendToSharePointFormsService.svc.cs

using
using System.Collections.Generic;
using System.Linq;
using System.Runtime.Serialization;
using System.ServiceModel;
using System.Text;
using System.IO;
using System.Xml;
using System.Net;
using System.Configuration;

namespace SendToSharePoint
{
  public class SendToSharePointFormsService : ISendToSharePointFormsService
  {
    public SendToSharePointFormsService()
    {
    }

    public string SendXmldoc(string DocinStringForm, string fileName, string servertouse, string librarytouse)
    {
     //declare variables
      string siteRoot, docLibrary, uname, pwrd, domn;

      //read appsettings for vars needed for sending file to SP
      try
      {
        siteRoot = servertouse;
        docLibrary = librarytouse;
        uname = ConfigurationSettings.AppSettings["UsernameApprovals"].ToString();
        pwrd = ConfigurationSettings.AppSettings["PasswordApprovals"].ToString();
        domn = ConfigurationSettings.AppSettings["userdomain"].ToString();
      }
      catch (Exception apps)
      {
        return "Error reading configuration settings from app.config - " + apps.InnerException;
      }

      //send to library
      string finalresult = UploadXmlToSharePoint(DocinStringForm, siteRoot, docLibrary, fileName, uname, pwrd, domn);

      return finalresult;

    }

    #region Actual sender
    private string UploadXmlToSharePoint(string docToAdd, string siteRoot, string docLibrary, string fileName, string userName, string password, string domain)
    {

      //build full destination Url
      string destinationPath = siteRoot + "/" + docLibrary + "/" + fileName;

      //convert the xml string sent from BizTalk into a byte array
      byte[] fileIn = ConvertDocToBytes(docToAdd);

      //holds MOSS service response values
      SharePointSvc.CopyResult[] results;
     
      //required fieldinformation array
      SharePointSvc.FieldInformation fieldInfo = new SharePointSvc.FieldInformation();
      SharePointSvc.FieldInformation[] fieldInfoArray = { fieldInfo };

      //destination url (notice that it's an array, meaning //multiple sites COULD be targeted
      string[] destUri = { destinationPath };

      //create instance of web service proxy
      SharePointSvc.CopySoapClient copycl = new SharePointSvc.CopySoapClient();

      //pass valid credentials
      copycl.ClientCredentials.Windows.ClientCredential = new NetworkCredential(userName, password, domain);

      //copycl.ClientCredentials.Windows.AllowNtlm = true;
      //call primary operation; sourceUri, doesn't matter here

      copycl.CopyIntoItems("http://none", destUri, fieldInfoArray, fileIn, out results);
     
      //check for error and return final result
      if (results[0].ErrorMessage != null)
      {

        return "Error: " + results[0].ErrorMessage;
      }
      else
      {
        return "Success Sending File to SharePoint at " + System.DateTime.Now.ToString();
      }

  }

   #endregion 
 
 #region conversions
   
     //bytes
    public byte[] ConvertDocToBytes(string xmlString)
    {
     ASCIIEncoding encoding = new ASCIIEncoding();
     return encoding.GetBytes(xmlString);
    }
    
    #endregion
  }
}


Host the SendToSharePoinForms WCF service in IIS (I believe there are numerous posts on the Internet on the various methods of hosting a WCF service in IIS)

Go on to Part 3 - Posting the forms from inside a BizTalk orchestration